


So, let's make cold porcelain -

The recipe will be different depending mainly on the brand of glue you use – for this one I used Elmer’s Glue-All – a white pva glue.
Ingredients
2 cups Glue
½ cup water
3 cups cornstarch
2 tablespoons baby oil
Tools
Plastic microwavable bowl
Strong wooden spoon or flat stick
Cup and Tbs measures
Spatula or blunt knife
Method
Put all the ingredients in your plastic microwavable bowl, stir together until they are fairly well combined.


NOTE – all microwave ovens are different – some cook super fast, some very slow.
Your cooking times will also depend also on the size of your bowl in relation to the amount of clay you are making – big bowl, little clay, it may take longer, big bowl, lots of clay may be slow at first then cook really fast once it gets hot.
So, err on the slow side at first – I do 1 min @ 10% or the lowest setting first – if it is barely warm I move to 1 min @ 30%.
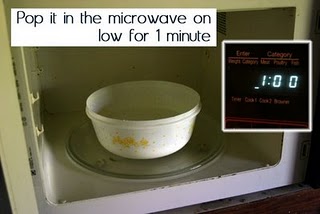

When the mix starts to get significantly thicker, harder to scrape off and stir, shorten your microwave times to 45s


When it's ready it will hold fairly well together when you mix it in the bowl and it will not stick to your fingers anymore when you press your fingers in.
BUT it's okay to take it out when it's still a little sticky and knead in more cornstarch: In general, it's better to UNDERcook a little than to overcook.


Sprinkle a generous layer of cornstarch on your table and over your hands.


If you choose to wash out your bowl, make sure you allow a lot of water to flow so the gluey mix does not clog your drains.
But, don’t clean up now – you need to pay attention to finishing your clay – so, cover your hands in lots of cornstarch and knead your dough.
Caution – your clay may be very hot – so check first before you plunge your hands in. But start kneading as soon as it reaches a temperature you can handle – if you leave it too long, a crust will start to form.
Dust your hands - no, smother them in cornstarch - and start to knead.
You’ll find it easily kneads into smooth consistency dough. Pull it apart to get the insides to the outside and make sure the whole dough get mixed in during kneading.

Put it in a plastic bag and tie it.

Colouring The Clay
You can easily colour this clay using any water based paint - acrylic, poster, watercolour, food colouring will all work. Some oil paints will also work but they may cause it to dry very slowly or may not mix in and will exude oil so be careful and try it out on a small bit first.
NOTE: Opaque paints will make your clay more opaque, translucent paints will help keep it see-through if you want to make decorations that the light will shine through.


You’ll find it can get quite wet without becoming sticky if it is made well. And at the other end of the spectrum, don’t mix it until it starts to dry out either! You can add in more paint i.f you want a stronger colour


When you’re done colouring, and marbling, pop the clay in a plastic bag and tie it off.
Let us know if you try this out - and if you have any questions - just pop it all in the comments box - love to hear from you.
If you enjoyed this tutorial please help publicize the blog by clicking on the ShareThis button below or or sending your friends to have a look - and why not sign up for the RSS feed or to receive email notification of new posts!
Copyright:
You may download this tutorial for personal use or use in your classroom - if you wish to use it for any other purpose, please use the contact form to ask permission.





 ShareThis



 Published a new blog post:
  Twittered:


 Posts
Posts


16 comments:
Oh my gosh, these are amazingly detailed and helful directions! Thanks so much for the pictorial step-by-step.
You're welcome Mary and good to see you exploring my blogs - I'm taking a look at yours too.
And I just realized I'm missing the tip to put lots of cornstarch on your hands also - I'll add that in now!
thanks for your woderful comment..i really liked the tutorial for the cold porcelain..if i find time im gonna try them..kool...
Quite amazing, what a good step-by-step post.
thanks Masterpiece and Martin - glad you liked the tutorial!
I love it when people post tutorials without asking to be paid for it. Wonderfully detailed, should be easy to follow if I find the time ...
Thanks Maren, and you're welcome (for the info :) Hope you find the time - it is fun!
This is a wonderul tutorial! I can't wait to "play"
Hope you have fun! I'd love if people would like to show some of their own creations in the cold porcelain - use the contact form if you'd like to and we can organize that!
Very nice step by step explanation and I am eager to make them for me.
Thanks,
Lisa
Hi! This was a great tutorial but this is a tip I've learned from making porcelain myself. Mixing water in your clay doesn't help at all. Its better just to mix the glue and cornstarch till it forms the paste then microwave. But hey it just may be me. ^^ adding water to clay makes it cracks as it dries because the water trapped inside is evaporating. Yah for research!! ^^
Anonymous, thanks - that's interesting; I have made with and without water, but not done exact tests to see if I cook the same if one cracks less or more...I have to make some CP today, so perhaps I will do this test.
I do find the main problem with CP is that sometimes it cracks...I added in some heavy hand cream once and I did like the texture - many tutorials suggest cold cream but I just used a cream for ultra-dry hands :)
Very grateful for those of you who read this and do make your CP to share your tips too! I will put them all together into a post if I get enough....so SHARE please!
No problem just trying to help the next clay creators. By the way I'm only 15 ^_^ and I can make just about anything out of clay. My first piece was a moon pendent made myself. NEVER TAKE IT OFF!! I attached to it lol. Anyway, keep creating these great ideas please. =)
Love this! Looks like it will be a great project with my son. Thank you for the excellent and easy to understand tutorial and I'll be subscribing to your blog.
I can't wait to try this!! I've been wanting to make charms for wine glasses for some time, I'm gonna do this!!
thanks Finola
You're welcome! Just remember that this clay needs complete lacquering to be waterproof! Otherwise it's a lovely hard clay when dry, but just not totally waterproof.
cheers!
Post a Comment